WordPress WP Fastest Cache Configuration
If you need to exclude specific URIs from being cached by WP Fastest Cache in WordPress, follow these simple steps:
Step 1: Access WP Fastest Cache Settings
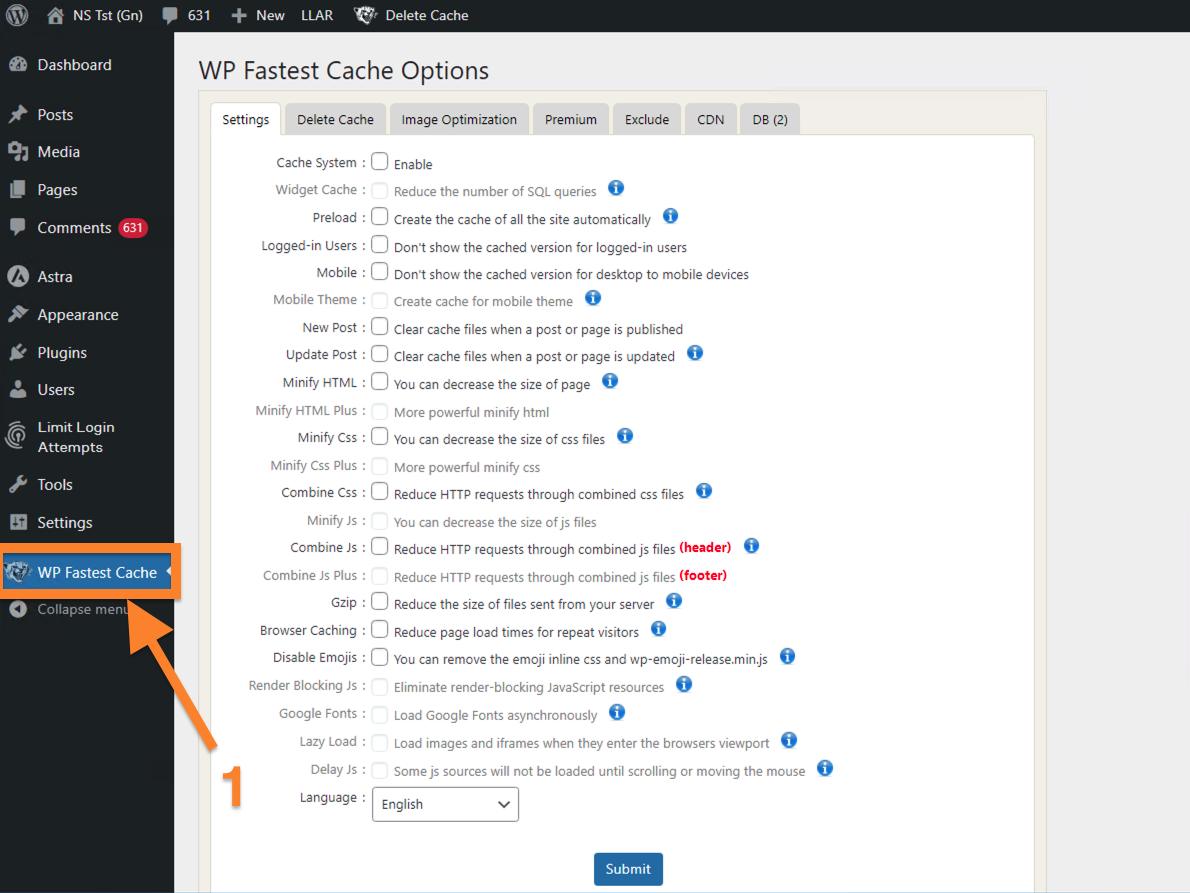
Log in to WordPress: Start by logging into your WordPress admin dashboard.
Navigate to WP Fastest Cache: In the left-hand menu, click on WP Fastest Cache.
Step 2: Configure Exclusions in the Exclude Tab
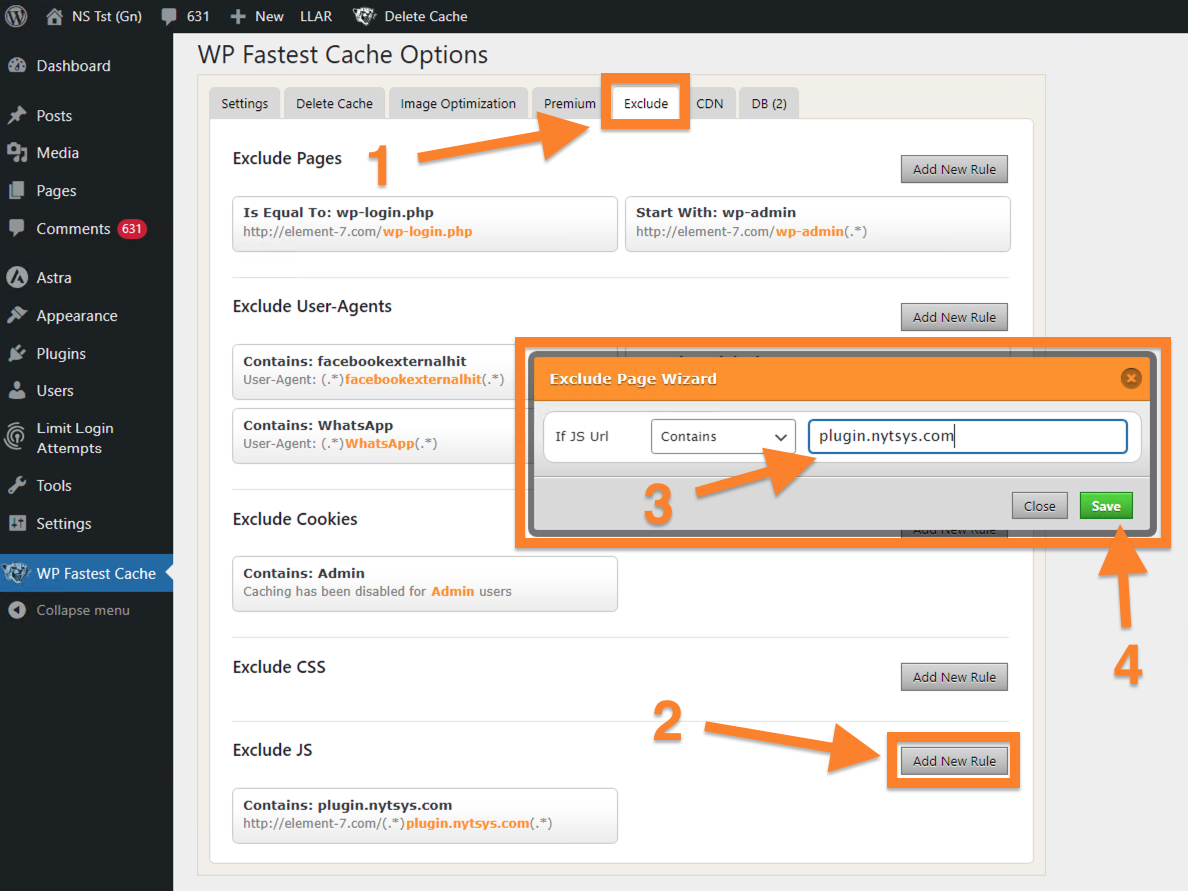
Click the “Exclude” Tab: In the WP Fastest Cache settings, navigate to the Exclude tab.
Add a New Exclusion Rule: Next to the Exclude JS section, click the Add New Rule button.
Enter the URI to Exclude: A pop-up window will appear. In this window, add plugin.nytsys.com to ensure this URI is excluded from caching.
Save Your Changes: After entering the URI, click the Save button to apply the exclusion rule.
Step 3: Clear or Purge the Cache
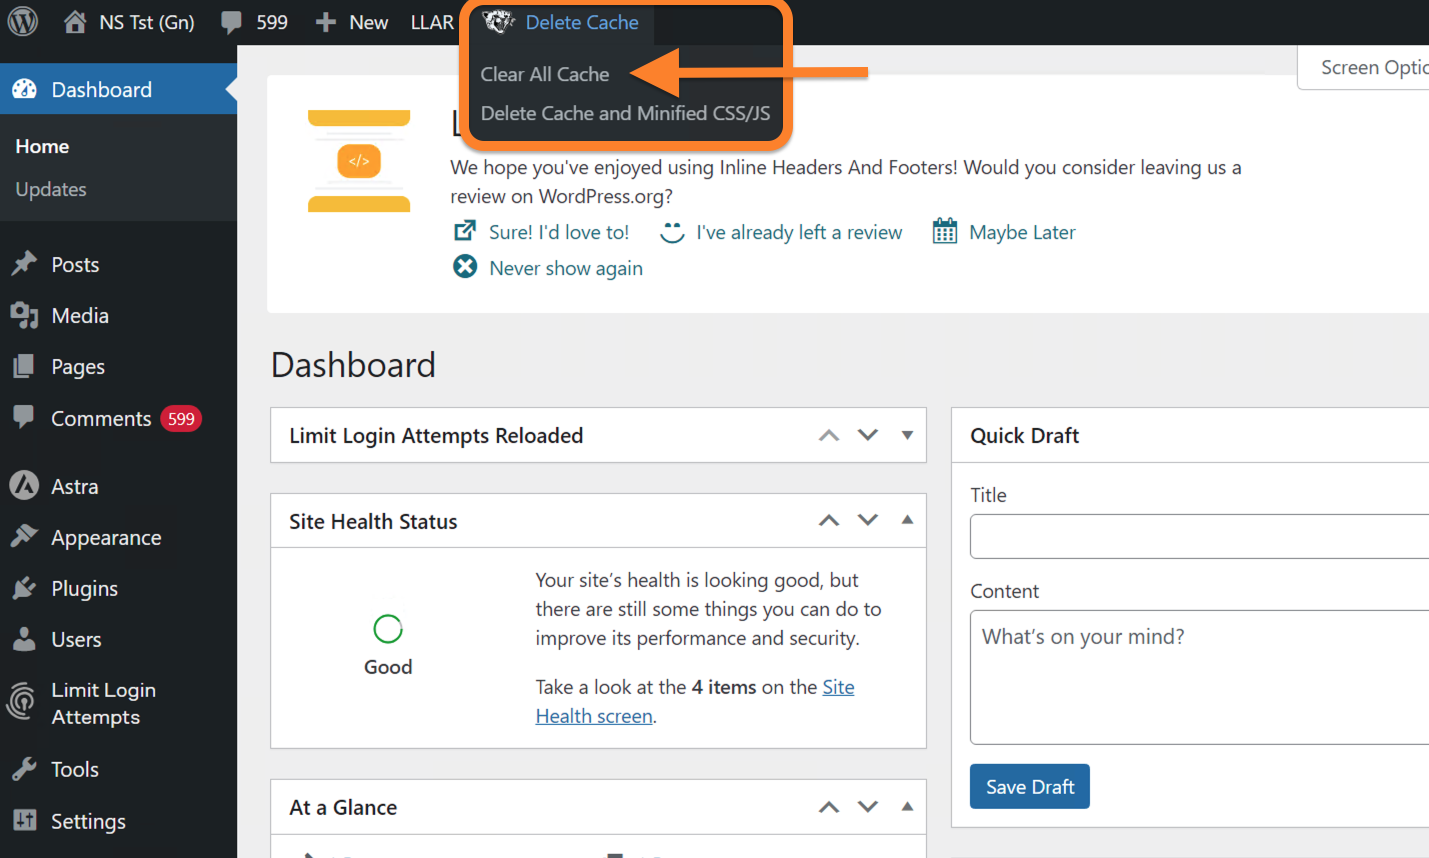
Clear the Cache: To make sure the changes take effect immediately, go back to the main WP Fastest Cache page and click the Delete Cache or Purge All Cache button. This will remove the old cached files and regenerate them with your new settings.

You're All Set!
The specified URI, such as plugin.nytsys.com, will now be excluded from caching, ensuring that any associated JS snippets or other content will function correctly on your site without being cached.